Interior Design

4 DIY Projects for a Glam Master Bedroom on a Budget

Aside from the living rooms and kitchens, we spend quite a bit of time in our bedrooms. Not just for sleeping, but for getting dressed and ready for the day, making phone calls, reading, or even getting a jump start on cleaning out the DVR. Since we spend so much time in there, why not make it as pleasant of an experience as possible? Here are just a few ideas that can help spruce up the 'place where the magic happens' for pennies on the dollar.

Creative Covers for your TV

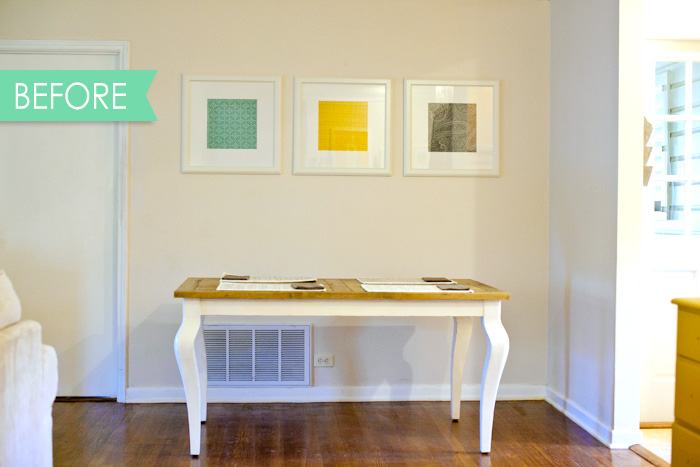
You can find numerous pro/con listicles for why you should or shouldn't have TV's in your bedroom. If you don't, Great! If you do, that's awesome, too! BUT, if you do have a TV in there, let's dress it up a bit. Covering your TV with simple medicine-style cabinet doors, or a sliding barn door, will help hide away anything unsightly. Even a simple picture frame mounted to the wall around the TV is a great way to keep the attention off the TV itself and incorporate it in a gallery wall with other art.

Put up a Canopy

It's easy to blow a few thousand dollars on a fancy canopy bed; it's such an upscale look that no one thinks twice about the cost. Maybe you should, though. It's way easier to make one yourself! You can find some simple curtain rods to create the same look and feel, or even use PVC pipe and various fittings (mixed with a bit of spray paint) for a simple Sunday project. You don't even have to go around the entire bed, the corners work just fine as well!

Paint, Paint, Paint!

Now is not the time to be boring with your paint choices; no more Taupe on Taupe. Now is the time to be bold! Don't shy away from some drastic color improvements.

Having said that, walls are very 'been there, done that.' Don't be afraid to get up on your ladder and pull a Michelangelo, because accent walls are out and accent ceilings are definitely in. But If you're not quite ready for a painted ceiling, consider painting accent colors on half walls all the way around your room rather than a full wall. It will bring a lot of drama to the room, while giving it the appearance of being taller than it actually is. If you're feeling really daring, you can always combine the two as well!

Molding/Paneling/Planking

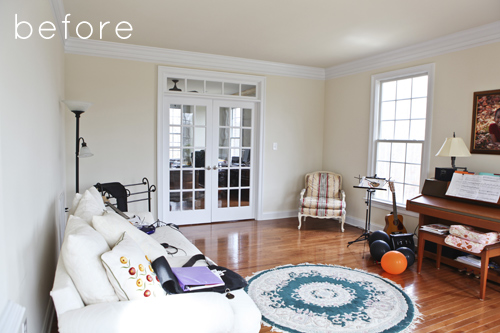
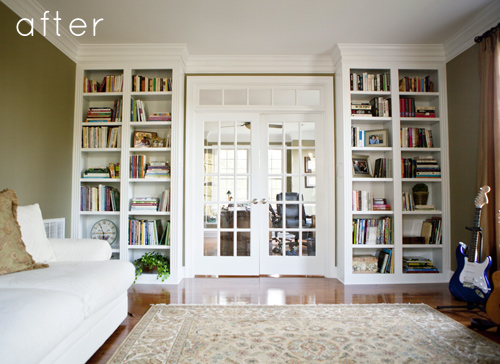
Nothing says 'classy' more than intricate molding in a room, whether it's at the ceiling, on the walls, or at the floor. If you want to really make your room pop, these are easy additions you can do in a weekend.

If you're not savy, look to this foam option for an easy crown molding install (you could even wrap molding around your new canopy!). Looks as good as the real stuff, but can be done without all the tools. If you have existing baseboards, you can add some extra height with some paint and a simple half-round from your local hardware store. It's an easy way to bump up the 'wow this place looks expensive' factor.

For those of you who are a bit more handy, partial (like this DIY blog shows) or full-wall paneling (like this blog) can be a bit time consuming and a little more expensive, but the bang-for-your-buck factor is VERY high.

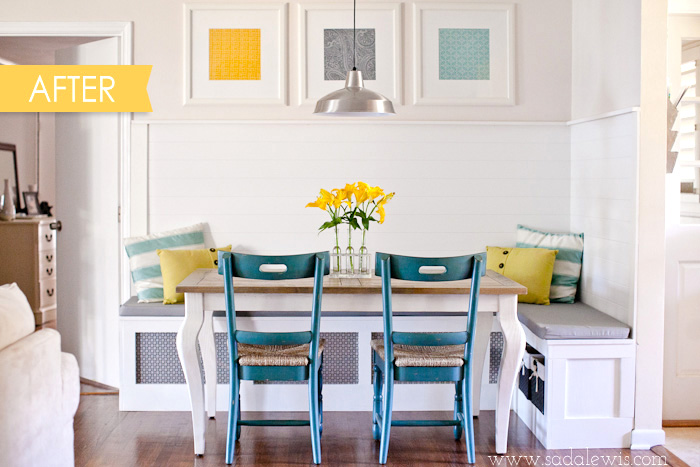
Sure, you could just paint the walls, but it's way more fun to nail some wood to the walls first! Pallet wood, peel & stick vinyl flooring (seriously, picture #2 is peel & stick flooring!), or even a healthy dose of shiplap and a coat of paint are all great options to mix different textures along with new and fresh colors in your space.

Hopefully you can use one of these ideas, or even combine a few tips, for a new and improved bedroom space. Good luck!


The Brewery is Open!

A few months ago I had the opportunity to help a soon-to-be-opening brewery design their tasting room, and after months of licenses applied for, paperwork sent in, inspections upon inspections, Arches Brewing is now open for business!  I guess a bit of a backstory is needed for those of you living in states (or countries, since this is the internet) that don't have these laws; if you make your own beer you can open up a physical location to show off your beer. Now you can't actually sell your own beer thanks to distribution laws, so you have to sell 'tours' of your facility where you can pour smaller amounts for your patrons to sample. Long story short, they needed some design help, and they pay in beer (joking, kind of), so I said yes!

Their brewing philosophy follows the German brewing schedule. In layman's terms, their brewing schedule follows the weather, with their different beers finishing and ready for drinking to go with the changing seasons. With the German taste driving their beers forward, they wanted a simple and clean tasting room that would still invoke the feeling of a traditional German beer hall.

We're really close to that beer hall feel. It's a tall, open space with light earthy tones to help bring the outdoors in. Sound deadening material was used on the ceiling to keep the room from becoming an echo chamber during the sure-to-be-busy tasting days. We chose black to keep the room from feeling too bright, and to help frame the space out a bit. Reclaimed wood from an old cotton mill is used extensively to help reinforce the targeted old-world feel, and to mimic their old-world beers. I think over the next year or so it will have all the finishing touches it needs.

There are a TON of ideas I threw at them to help bring the European flair; some stuck, some didn't. Some will come in later, some may never. The important thing is that the brewers are ecstatic with their growing and evolving tasting room. You can see the beginnings of the process, as well as preliminary renderings on the website under "Current Projects." Just know that there were many emails, texts, visits, etc. to get the look to where it is from where it was. I'm just glad I finally get to drink their beer!

"How To;" Get the Tiny-House Feel

The Tiny House revolution has officially started. There are a myriad of reasons to make the switch to smaller square footage, and there have been studies to prove it. Versus normal-sized home owners, tiny-home owners on average have a higher yearly income, more money in the bank, less (or even no) credit card debt, and have no mortgage to pay off. All really great incentives to tiny-home ownership, right?

Buuuuut tiny-home living isn't for everyone. For every good statistic, there's a less desirable one. The biggest (haha, get it?) of these stats is obviously the smaller footprint and less square footage. The average home built today is over 2,100 square feet, while tiny homes today average only 186 square feet! So in today's "How To," we're going to look at a few ways you can attain the minimalist look and feel of the tiny home movement without getting rid of a vast majority of your precious, precious stuff.

First thing I would recommend is getting furniture that serves multiple purposes. I've always been a fan of cocktail ottomans, a hybrid between the ottoman and a cocktail table. Extra points if it's hollow and serves as storage. This solution can potentially get rid of that extra chair you have laying around and will also help clean up extra clutter you have laying around, such as magazines, books, and blankets. One large or medium sized depending on the size of your space can work. Or get multiple smaller ones for super versatile seating.

Above; ottomans thanks to Wayfair, here, here, and here.

Built-in banquette seating can be a really neat addition as well. If you keep the bottoms open and accessible. all of that extra space can be used for the big pots and pans you have in the kitchen, or larger hardly-used appliances that don't need to be taking up space on your counter tops. 

Above; banquette before and after thanks to Casa de Lewis.

Second recommendation is to utilize any and all 'extra' vertical spaces. Take a look at your main living space right now (family room, living room, whatever you want to call it). I can guarantee you've got at least one, maybe even two, empty and bare walls that are perfect for free floating shelves or a built-in shelving unit. I can think of three in my room right now! Shelves and built-ins can give you the opportunity to remove a few end tables and free up some major floor space to keep usable square footage to a maximum. 

Above; before and after pictures thanks to Design Sponge.

Third suggestion is all about lighting. Lighting can have a very drastic impact on the perceived space in your room. The darker the room, the smaller it will feel, and vice versa. now having said that, I wouldn't go buying a small army of table lamps to put everywhere. Having more light is important, but it's all about the type of light you have. You'll need a happy mixture of down lighting, or "task" lighting, diffused ambient lighting, and accent lighting. Task lighting will help illuminate smaller areas for reading, writing, etc. The ambient lighting will keep a nice uniform light throughout the entire space. Think recessed can lighting or even a few floor or table lamps with light shades to allow the light to diffuse evenly throughout the space. And finally the accent lighting will help highlight spaces you want your eye to hover, like those new built-ins and shelves, or special artwork.

Above; lighting examples thanks to the American Lighting Association.

Hopefully these little ideas and suggestions can help you clean up your space a bit and get that nice, uncluttered, and clean tiny-home look and feel. Thanks again!

Header image courtesy of POPSUGAR. Study thanks to the Tiny Life.