
There are plenty of reasons to soundproof a room (or several rooms) in your home. Maybe you have a home theater and you'd rather not wake up the kiddos. Or maybe those kiddos get in the habit of making a ton of noise and you'd rather work out of your home office in relative peace. Now technically speaking, it's really, really, REALLY hard to make a room completely soundPROOF. I like to think of these tips as a way to make your room sound RESISTANT (but for the sake of this post, we'll stick to saying soundproof). In any case, here's just a few of the many possible "How To" tidbits to taking those decibels from "rock concert" down to "crickets."
Do you remember moving in to your first apartment or home? Every room is empty and sounds SO loud. But once you start filling it up the rooms shrink up and the house stops echoing. Once you add the sofa, rugs, and curtains, the sound starts to go away. These "sound buffers" are the easiest and most cost-effective add-on fix to the loud spaces; pillows, canvased art work stuffed with egg-crate foam, tapestries, etc. If you can add more of these items to your loud spaces, they will do their part in keeping sound from bouncing out.


It seems simple, but adding a few soft goods can not only bring a room to life, but soften the sounds all around.
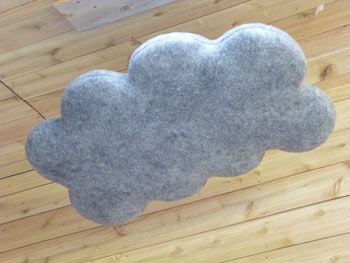
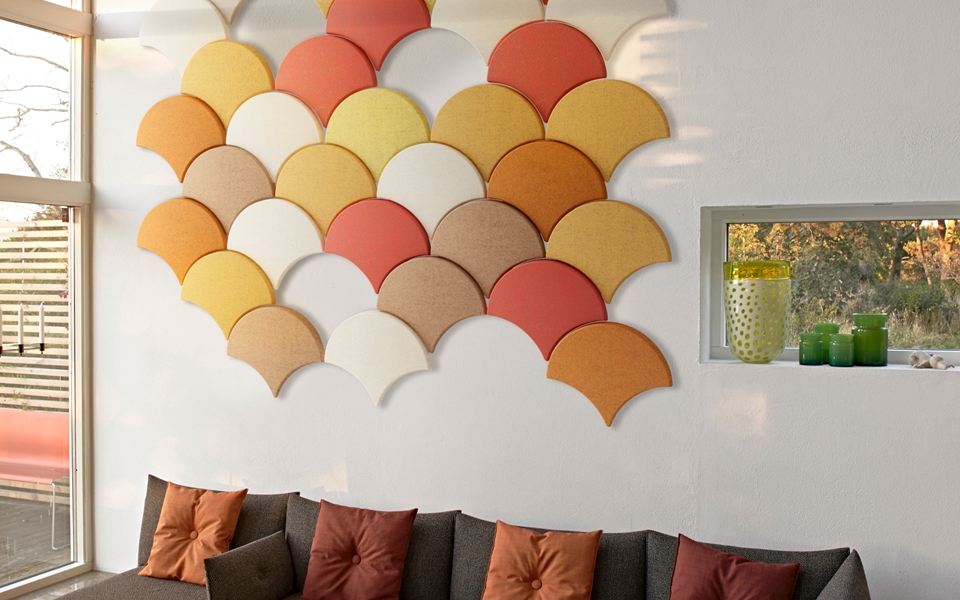
If a few pillows and throw blankets aren't cutting it, you can take the next step into soundproofing by adding paneling made specifically for acoustic control. There's the DIY hardware store foam panel wrapped in decorative fabric, which is by far the most economical choice. There's also these hanging clouds (available in other shapes as well)that have a really neat look (maybe for a whimsical nursery?), starting at around $200/piece. Lastly, custom shaped and colored acoustic panels that have the benefit of extra insulation, as well as help with the sound absorption (contact for pricing).


If you have the resources you can start 'proofing your rooms before you ever have an issue. This option would be your most costly, as it starts at the planning phase of construction. First, pick out the rooms that need the most protection, like a nursery or bedroom. Rather than building your walls in the traditional sense (see figure below, top diagram; drywall from neighboring spaces attached directly to the studs) you would instead give the insulation inside the wall a little breathing room and ensure studs from one room don't touch the drywall from the neighboring room (bottom diagram), thus stopping sound transfer (which is just vibrations) dead in its tracks.
Although it adds more thickness to your walls, the gaps in studs will stop vibrations from migrating to other rooms. This doesn't need to be done to every room, but even four walls around your loudest spaces will make a huge difference.
Hopefully these few tips will get you on the right track to some much deserved peace and quiet!
Products and pictures thanks to Oak Ridge Revival, DIY Masterz, Wooly Shepherd, BAUX, and Bla Station.
